
How can I setup my own custom product tags?
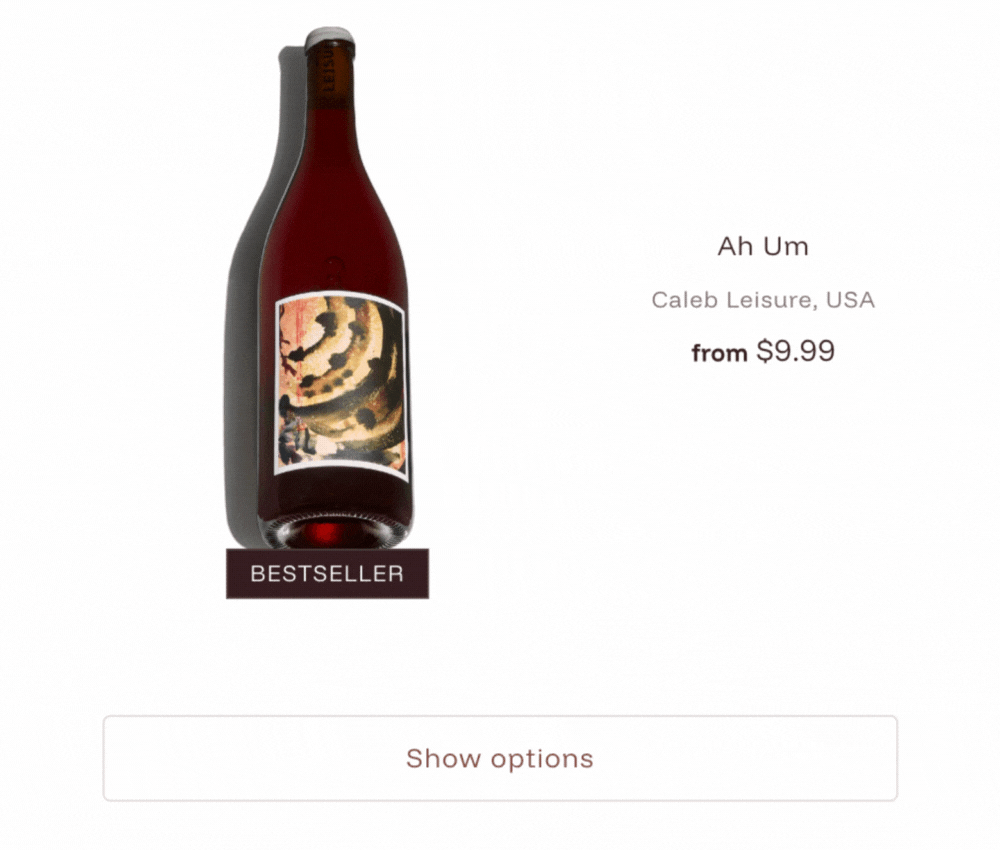
Product tags can be added in the product and collection pages to convey important product information at a glance or draw attention to special labels or promotions.
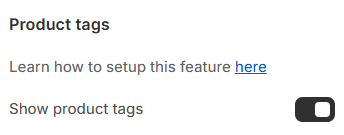
Activating this feature
You can display custom product tags in three different areas of your theme, depending on where you want them to appear.
Product page
In the theme editor, navigate to the Product page template by clicking on Products, then Default product from the page selector.
In the left sidebar under Products, click Add section and select the Product tags block.

Featured collection section & Collection page
You can show product tags in the featured collection section and collection pages by enabling this option in Theme settings > Product tiles.
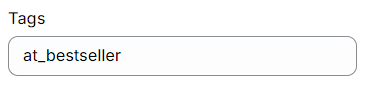
Creating product tags
Go to products in the Shopify admin and open the product you'd like to add a tag.
In the 'Tags' field, add a tag in the following format: at_icon-name
at (indicator to let the theme know it's a custom tag)
icon-name (this is replaced with any supported tags listed below)
List of supported tags
at_acorn
at_amphora
at_award-winning
at_barrel
at_beef-cuts
at_beef
at_bestseller
at_biodynamic
at_case
at_celebration
at_champagne-bottle
at_cheese
at_cool
at_corkscrew
at_custom
at_dessert
at_favorite
at_fish
at_food-pairings
at_gift
at_grape
at_heart
at_lamb
at_leaf
at_local
at_mineral
at_natural
at_poultry-leg
at_red-wine
at_sparkles
at_star
at_sustainable
at_vegan
at_white-wine
at_wine-tour
at_women
Removing product tags
Open the product in the admin where you'd like to remove the tag.
In the Tags field, find the product tag to delete and click the X button.
Save the changes.
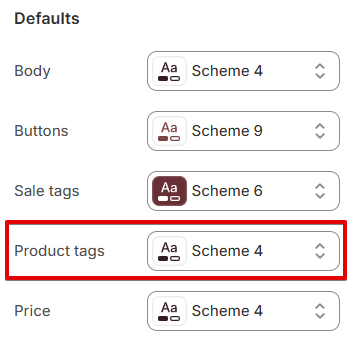
Designing product tags
The tag text and background colors follow the color scheme selected under Theme settings > Colors. Note that the texture from the color scheme is not applied.
The texts used in the product tags can be edited in the language editor.