Using the Image Comparison section
With our Image Comparison section, now available on all our Shopify themes, you can easily add an image comparison slider to your Shopify store without an app or coding required.
The Image comparison slider allows you to easily create and add an interactive Before and After Slider to your product images without any custom coding. With this new feature, you can catch your customers' attention and enhance your store's visual appeal in minutes.
Adding the Image Comparison section
Login to your Theme editor and navigate to the page you would like to display this section.
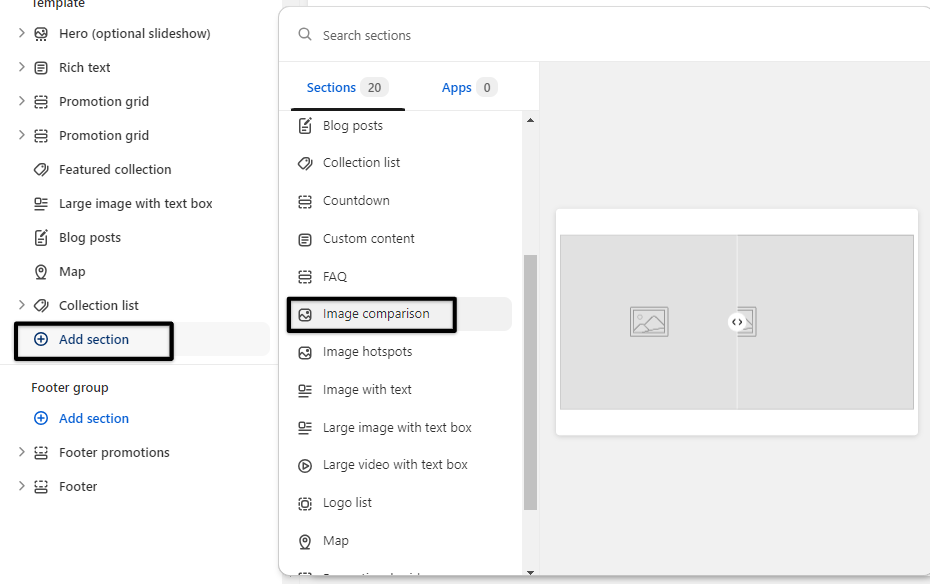
You'll see a list of available sections on the left-hand side. Locate the Add section button and click on it.
From the list of available sections, find and select Image comparison.
Image Comparison Section details
After adding the Image Comparison section, you will be presented with customization options and settings that you can adjust to match your store's style.
Image Comparison Block:
Heading - This will serve as the header or title of your section. For this one, we suggest using a short, but clear or concise title.
Heading size -This controls the size of the Heading (Small, Medium, Large, Extra Large).
Heading position - This controls the Heading position (Left, Center, Right).
Full page width - Maximize the page width for this section.
Slider style - You have two options for the arrow which is the Classic (defined arrow with a background) or the Minimal (less defined arrow without any background).
Height - Option to control the height of the section with 400px to 900px setting.
Colors (Buttons) - Allows you to choose the color of the arrow.
Lazy load images - Lazy loading should be enabled when section images are below the fold. In this way, we can save the user from having to download excess resources on their devices by lazy loading all the images.
Image Block
From here, you can select, upload or Explore the images you'd like to use for the Comparison section.

